
Using the MTD IT Bridging Template
The MTD IT Bridging Template allows accountants and their clients to maintain income and expense records in a spreadsheet and upload them into Capium for use in the client's MTD IT submission.
This article explains how to download and complete the Bridging Template, upload the records into Capium, review the uploaded information and re-upload the template when required.
Before you start
Before using the Bridging Template, make sure the client has been set up and is ready to complete their MTD IT submissions. The following steps should be completed before continuing with this article:
- Add or locate the client: The client must be set up as an Individual in Capium and MTD IT module is enabled for them.
- Authorise the client with HMRC: The client must be authorised before MTD IT submissions can be made.
- Sync the client's income sources: The relevant income sources must be synced from HMRC and available in Capium.
- Choose the right workflow: Confirm that Workflow 1 – Bridging is appropriate. There are four available workflows, and the correct workflow depends on where the client's records are kept.
Once these steps have been completed, you can continue with the Bridging Template process below.
Step 1: Download the Bridging Template
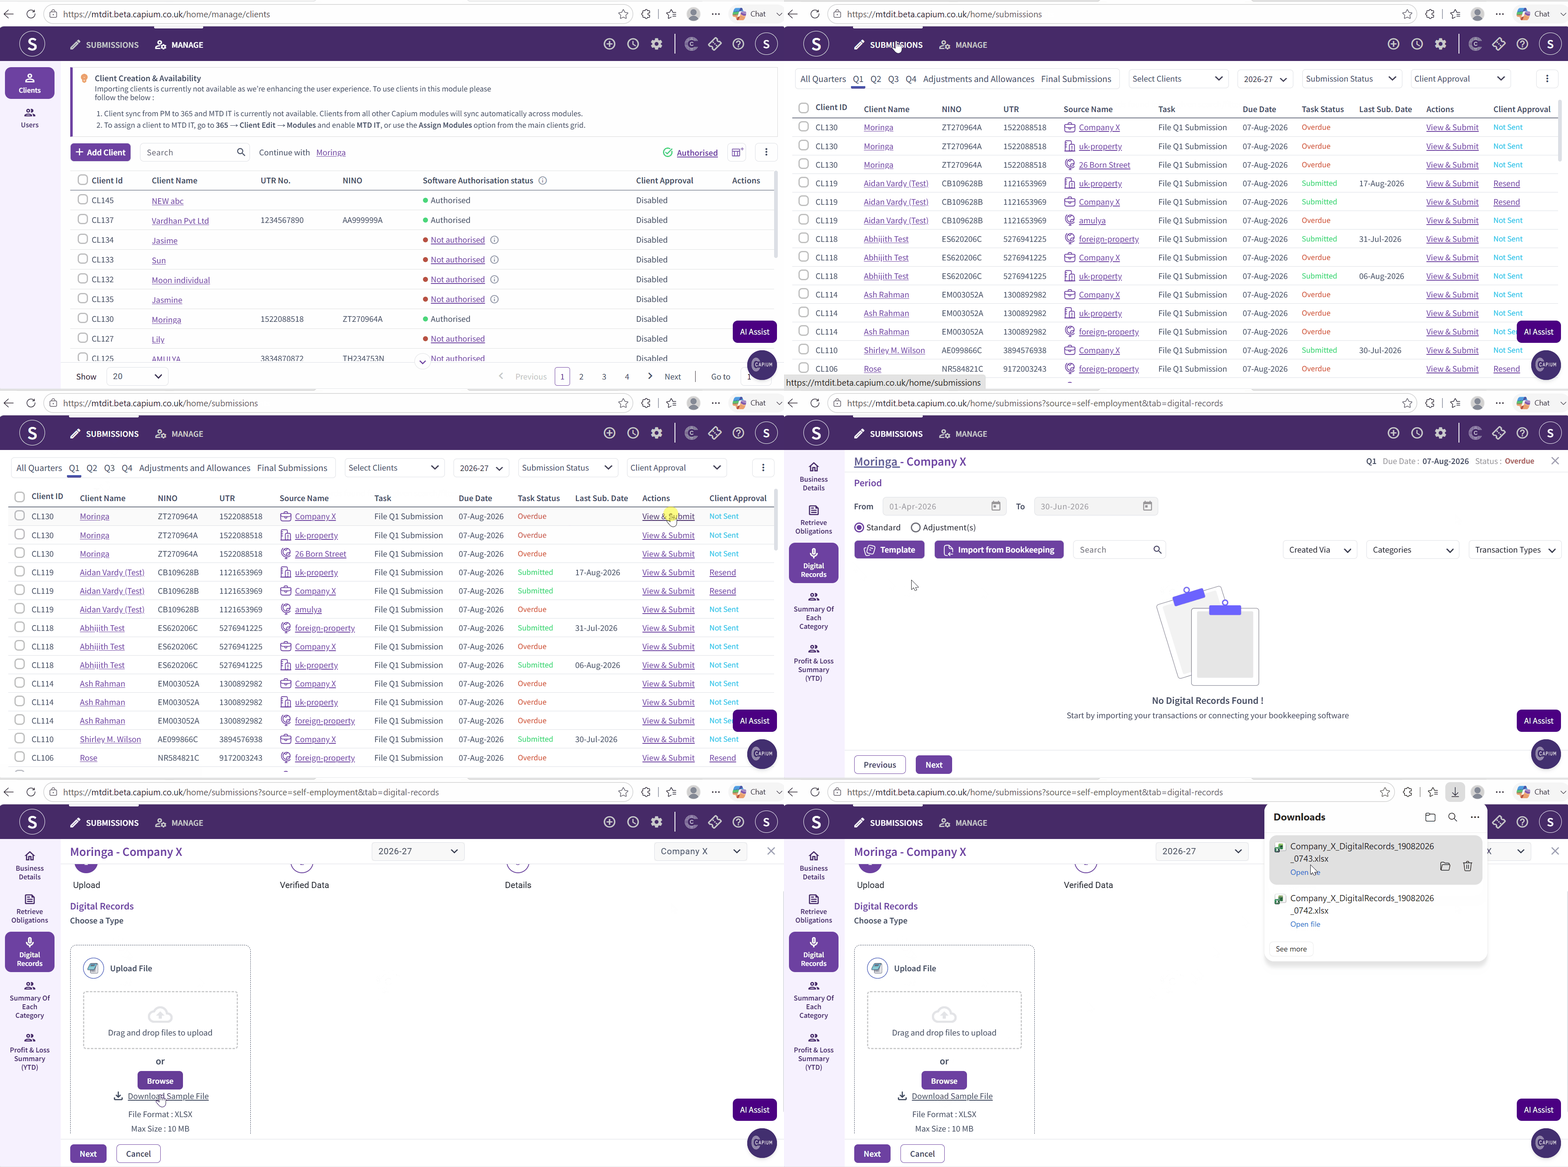
- Navigate to Submissions.
- Locate the relevant client and their income source .
- Select View and Submit on the client's row.
- Select Digital Records.
- Select Download Sample File.
Navigation: Submissions > View and Submit > Digital Records > Download Sample File
| Note : a separate template is available for each relevant income source, including Sole Trader, UK Property and Foreign Property. Make sure you download the correct template for the income source you are working on. |
Please see image below :
Step 2: Complete the Bridging Template
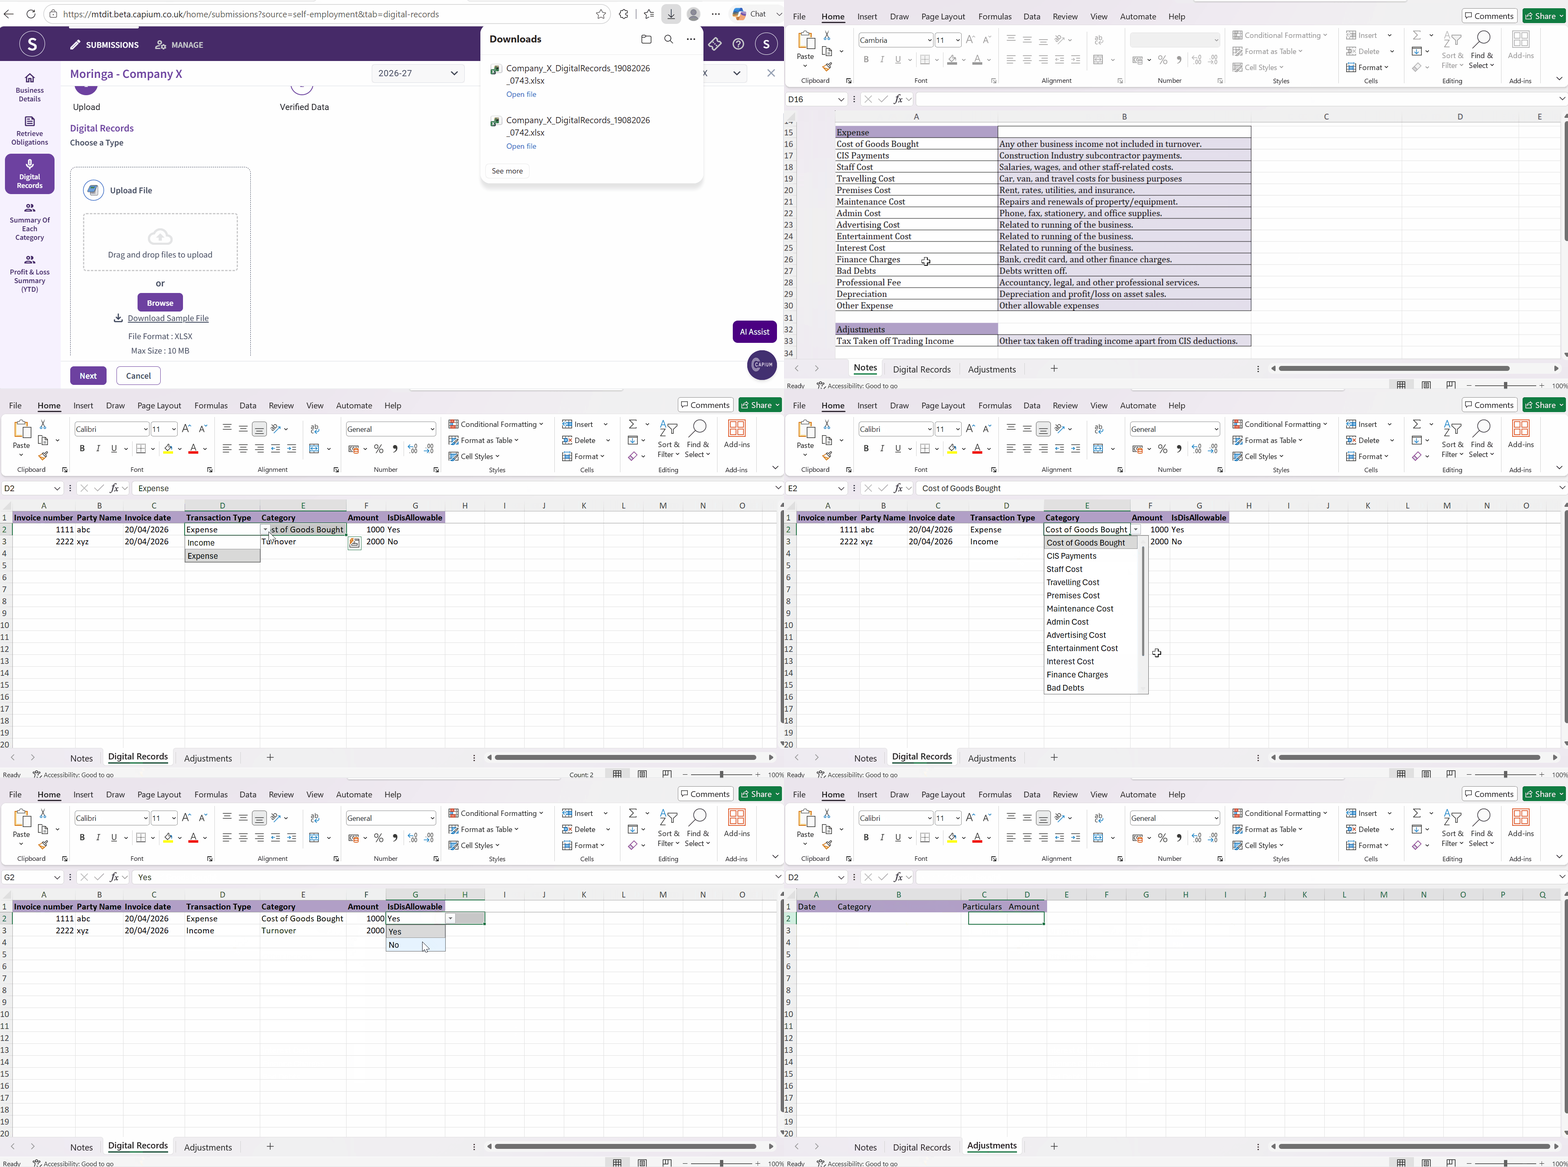
Complete the downloaded template with the relevant income, expense and adjustment records.
The Digital Records section includes:
- Invoice number – the reference for the transaction.
- Party Name – the customer, supplier or relevant party.
- Invoice date – the date of the transaction.
- Transaction Type – select whether the transaction is Income or Expense.
- Category – select the relevant income or expense category (e.g., turnover, cost of goods, travel, Admin cost).
- Amount – the value of the transaction in pounds sterling.
- IsDisAllowable – indicate whether the expense is disallowable for tax (Sole Trader template only). If the transaction is disallowable, select Yes
The template also includes an Adjustments section. Complete the following fields where applicable:
- Date
- Category
- Particulars
- Amount
Once all required information has been entered, save the completed template
Please see image below :
Step 3: Upload the Bridging Template
Once the template has been completed and saved:
- Return to the client's Digital Records section.
- Select Browse.
- Select the completed Bridging Template from your computer and next .
- Review the warning message displayed by Capium and select the checkbox to confirm that you want to proceed.
- Select Yes to upload the records.
Navigation: Submissions > View and Submit > Digital Records > Browse
Please see image below :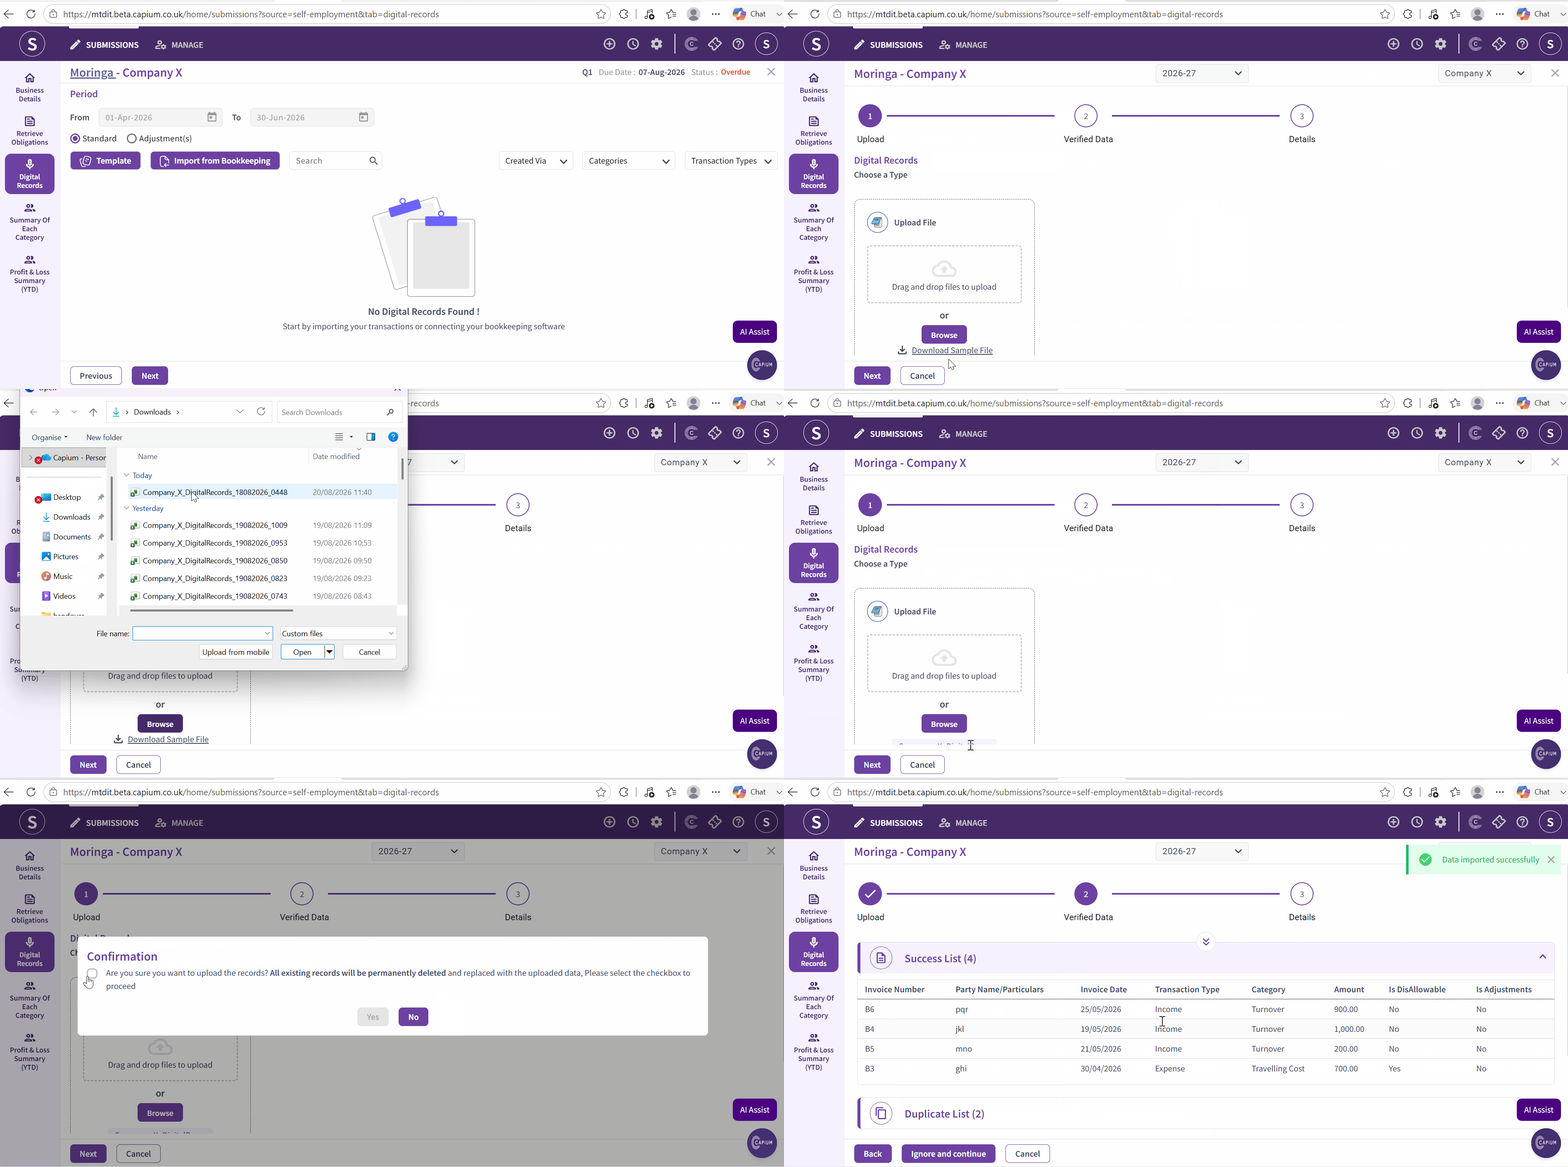
Step 4: View the Uploaded Records
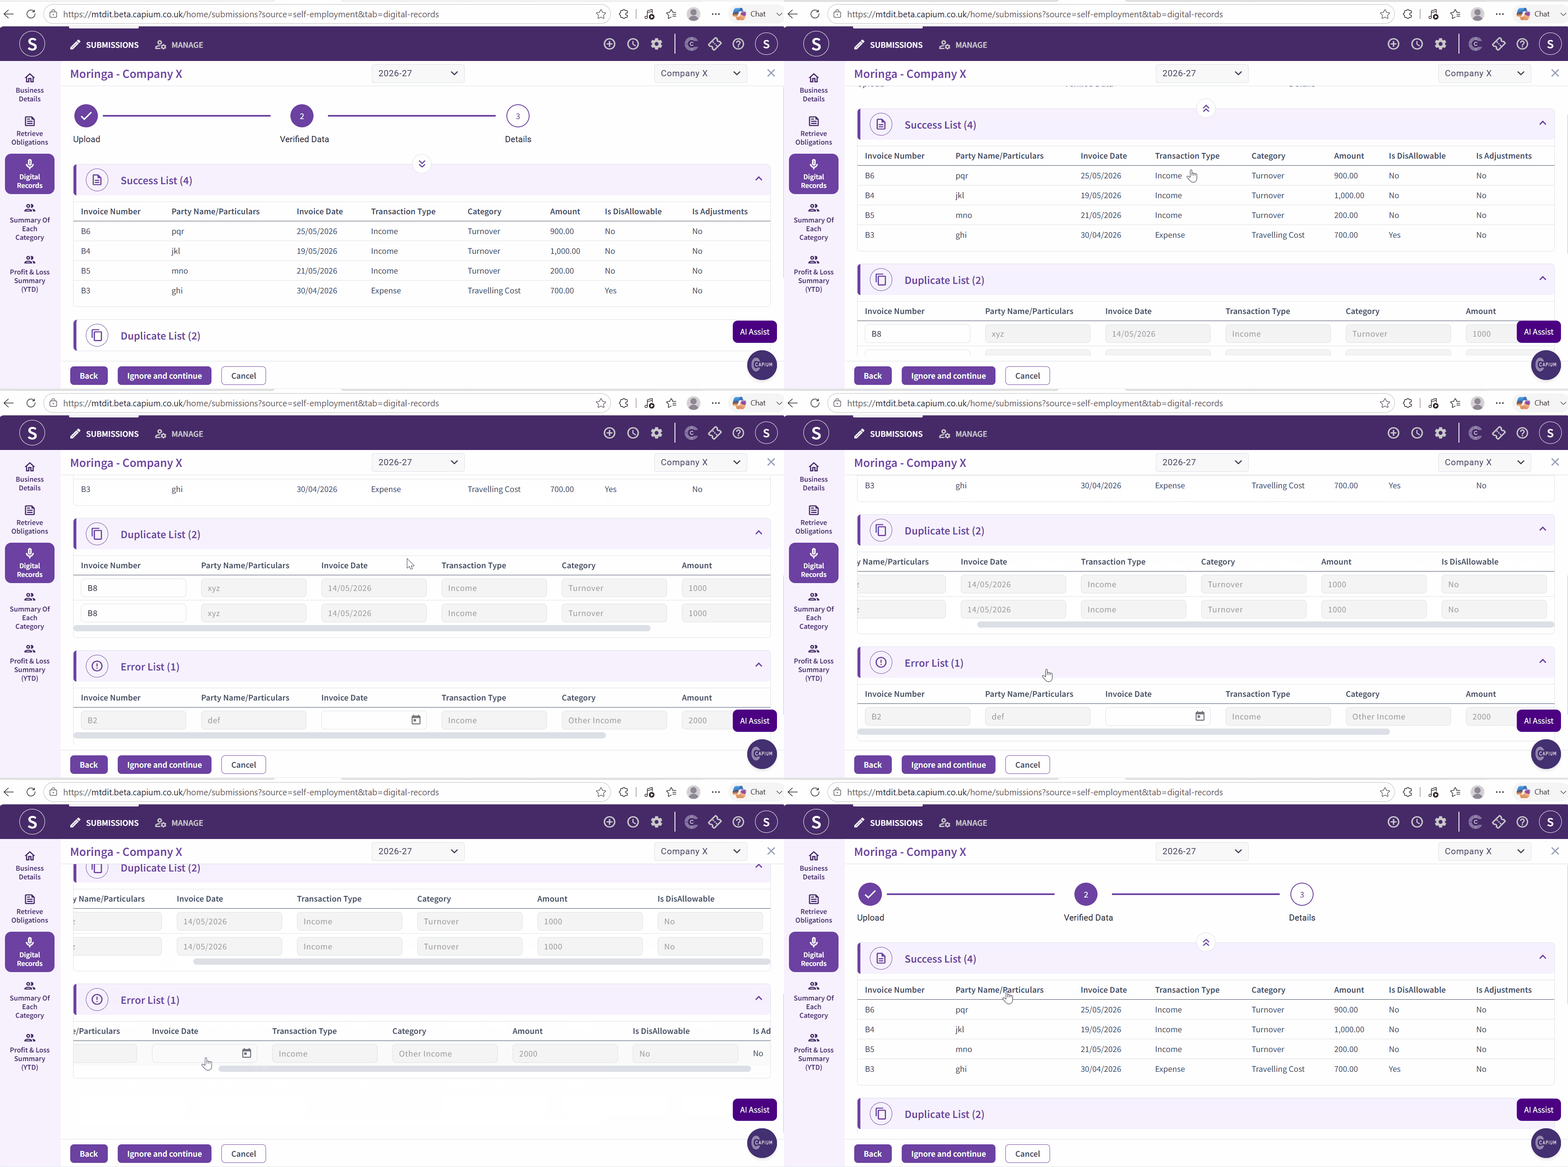
Once the template has been uploaded, Capium will validate the records and display the results in separate Successful, Duplicate and Error lists.
- Successful records: These are records that have been uploaded and populated correctly in the client's digital records.
- Duplicate records: system will flag any duplicated records within the template .
- Error records: These are records that could not be populated correctly. This may occur when information in the Bridging Template is not in the required format, for example, where a field contains a comma or unsupported special character.
| Important: The Bridging Template is the source of truth for your digital records. You cannot edit transaction details directly within the software. If you need to make changes, update the Bridging Template and upload the updated file. |
Please see image below :
Re-uploading the Bridging Template
If you need to update or replace existing transactions, make the required changes in the Bridging Template and follow Steps 3 and 4 above to upload and review the updated records.
When re-uploading a template, a confirmation message will appear like shown below:
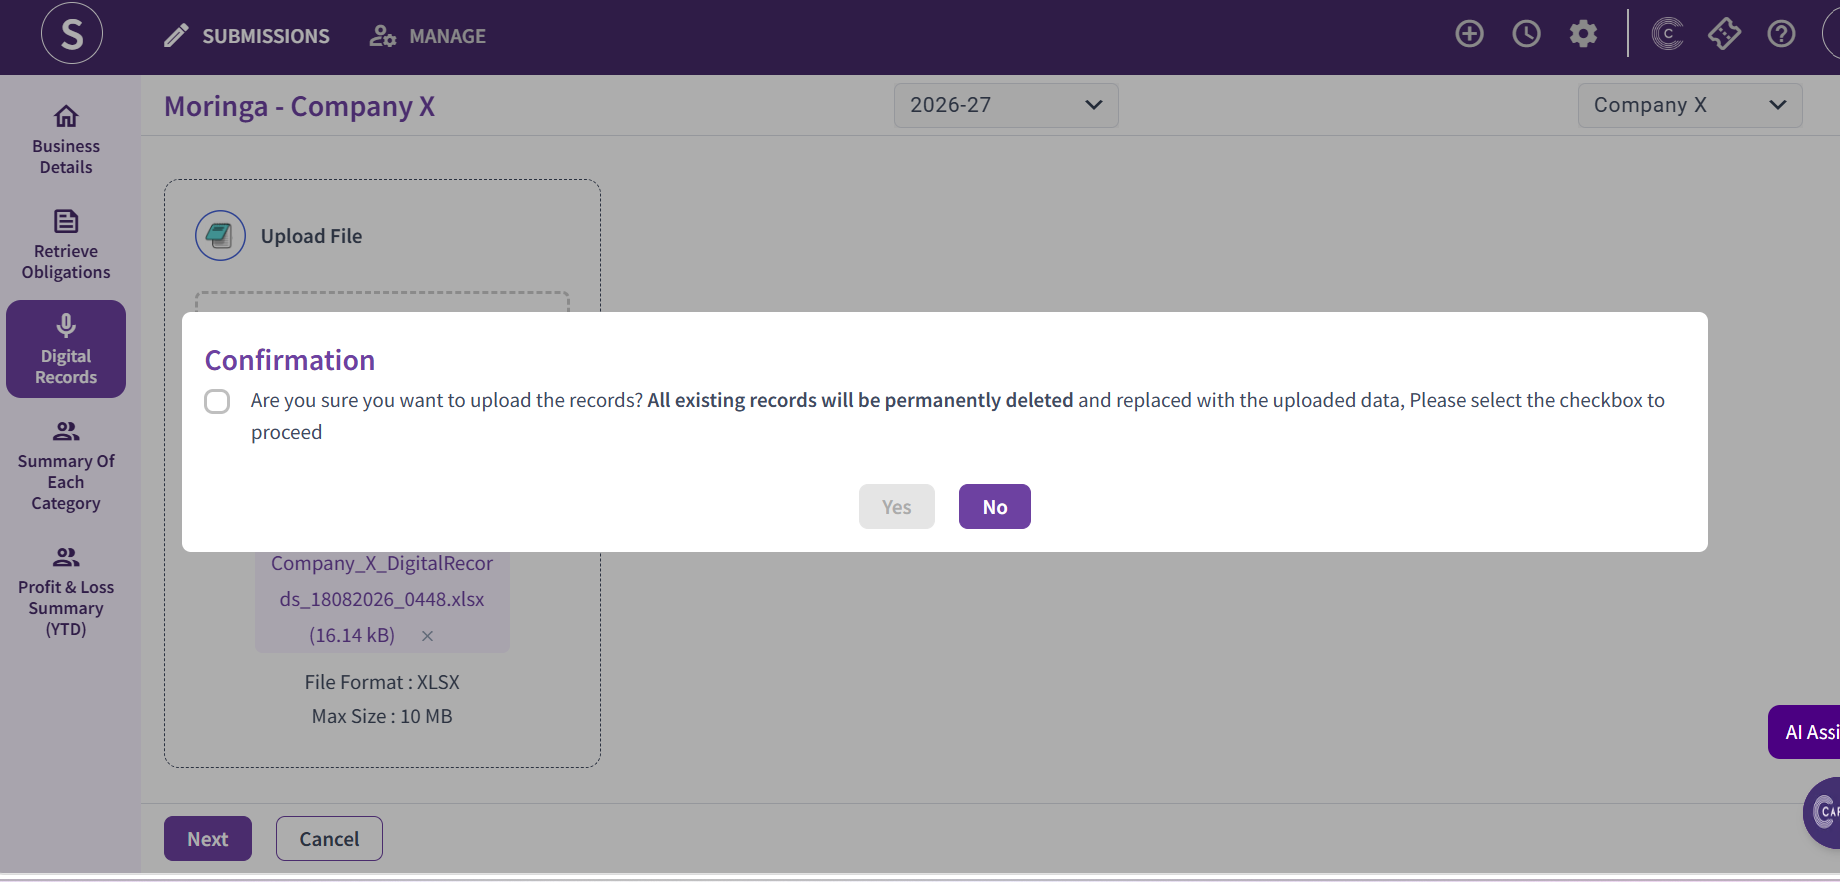
Review the message carefully, select the checkbox to confirm, and select Yes to proceed.
Important: Re-uploading a template permanently replaces the existing digital records with the information contained in the uploaded file. Make sure the file includes all records you want to retain before proceeding. |
Next steps
Once the digital records have been imported and reviewed, return to MTD IT: Bridging Workflow (Workflow 1) and continue with the next stage of the MTD IT submission process.
Related Articles
MTD IT - Choosing the right workflow
MTD IT: Bridging Template Workflow (Workflow 1)
MTD IT - Adding New Clients : Capium Support - Click here for help
MTD IT: Sync Sources from HMRC | Capium Support : Capium Support - Click here for help
Find attached the self employed , UK Property and foreign property template .