
The Directors section allows you to add and manage company directors within Accounts Production. Director information can be maintained for reporting purposes and are displayed on the Company's information page within the reports.
Before you start
- Add the client to the My Admin section and enter all relevant client details required to generate the Annual Accounts.
- Ensure that all required information is completed in the Settings section in the Accounts Production module so that the Annual Accounts can be generated accurately and contain all the necessary details.
You can add the Directors's information in 2 ways:
1. Update Directors Information from Companies Houses
2. Add the Directors Manually
1. Update Director Information from Companies House:
You can update the director’s information using the latest data available from Companies House.
Once you click on the ‘Refresh All Company Directors’ option the system will update the director information using the latest available data from Companies House.
This ensures that your company records reflect the most up-to-date director’s information.
Navigation: Accounts Production > Client specific > Update Directors > Refresh All Company Directors
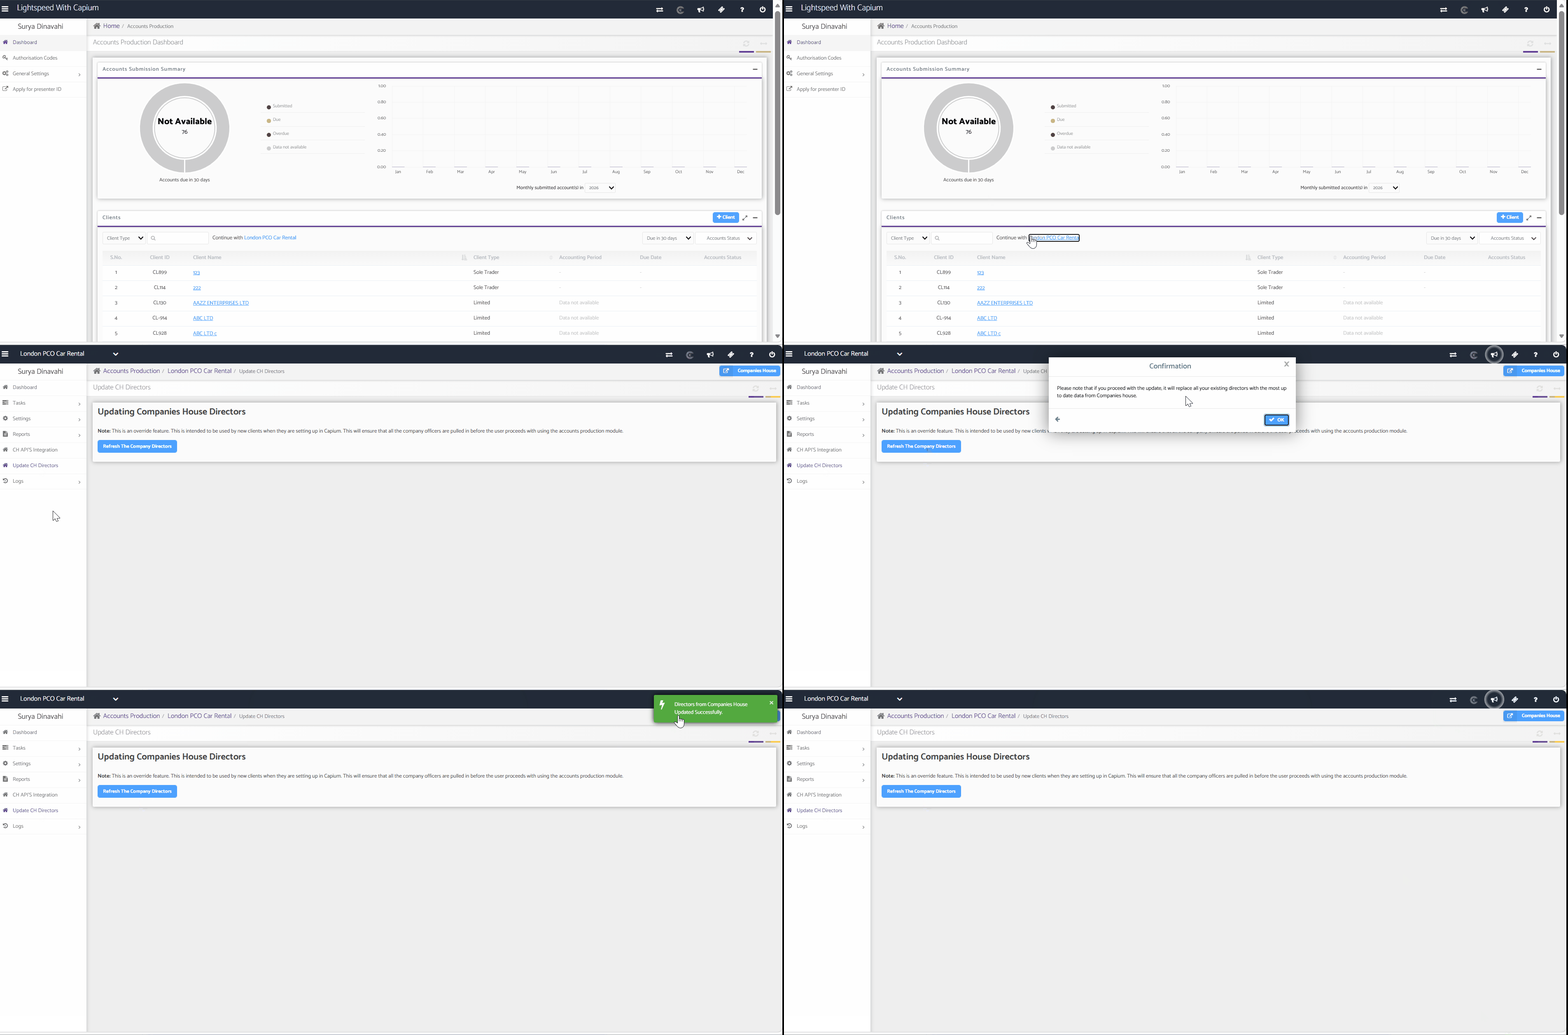
2. Manually Add Directors
In this section, you will be able to add the Directors details manually into the system and make sure all the relevant information is updated correctly.
Navigation: Accounts Production > Client specific > Settings > Company Contacts > Directors
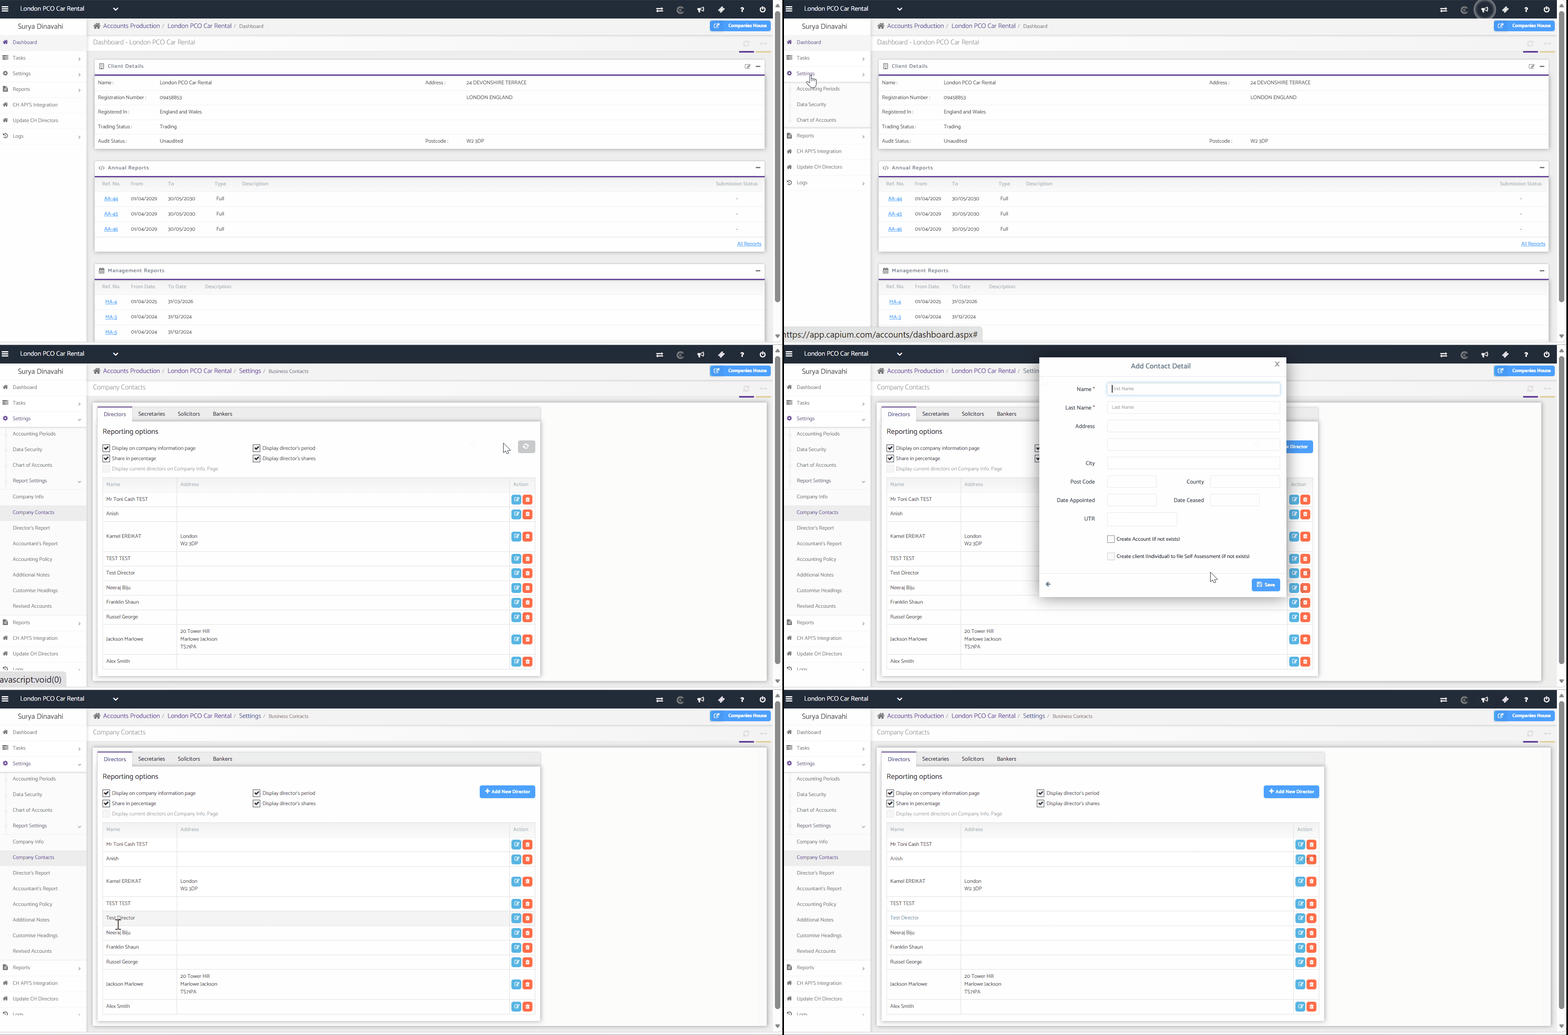
Steps:
1. Add a New Director
2. Display the Director on Company Reports.
3. Edit or Delete a Director.
Step 1: Add a New Director:
Navigation: Accounts Production > Client specific > Settings > Company Contacts > Directors
Click '+ Add New Director'
A Contact details page will open where you can enter the director's basic information. Ensure all the information is provided correctly. Complete the relevant director information including the director's name and any additional details required.
- Director's Name
- Address
- Date of Appointment
- Cease Date
- UTR Number
Once you click on the checkbox, it also allows to create a new account if it does not yet exist as well as create them as an individual in order to file for Self-Assessment.
Once all information has been entered, click Save.
Please check the below GIF for reference
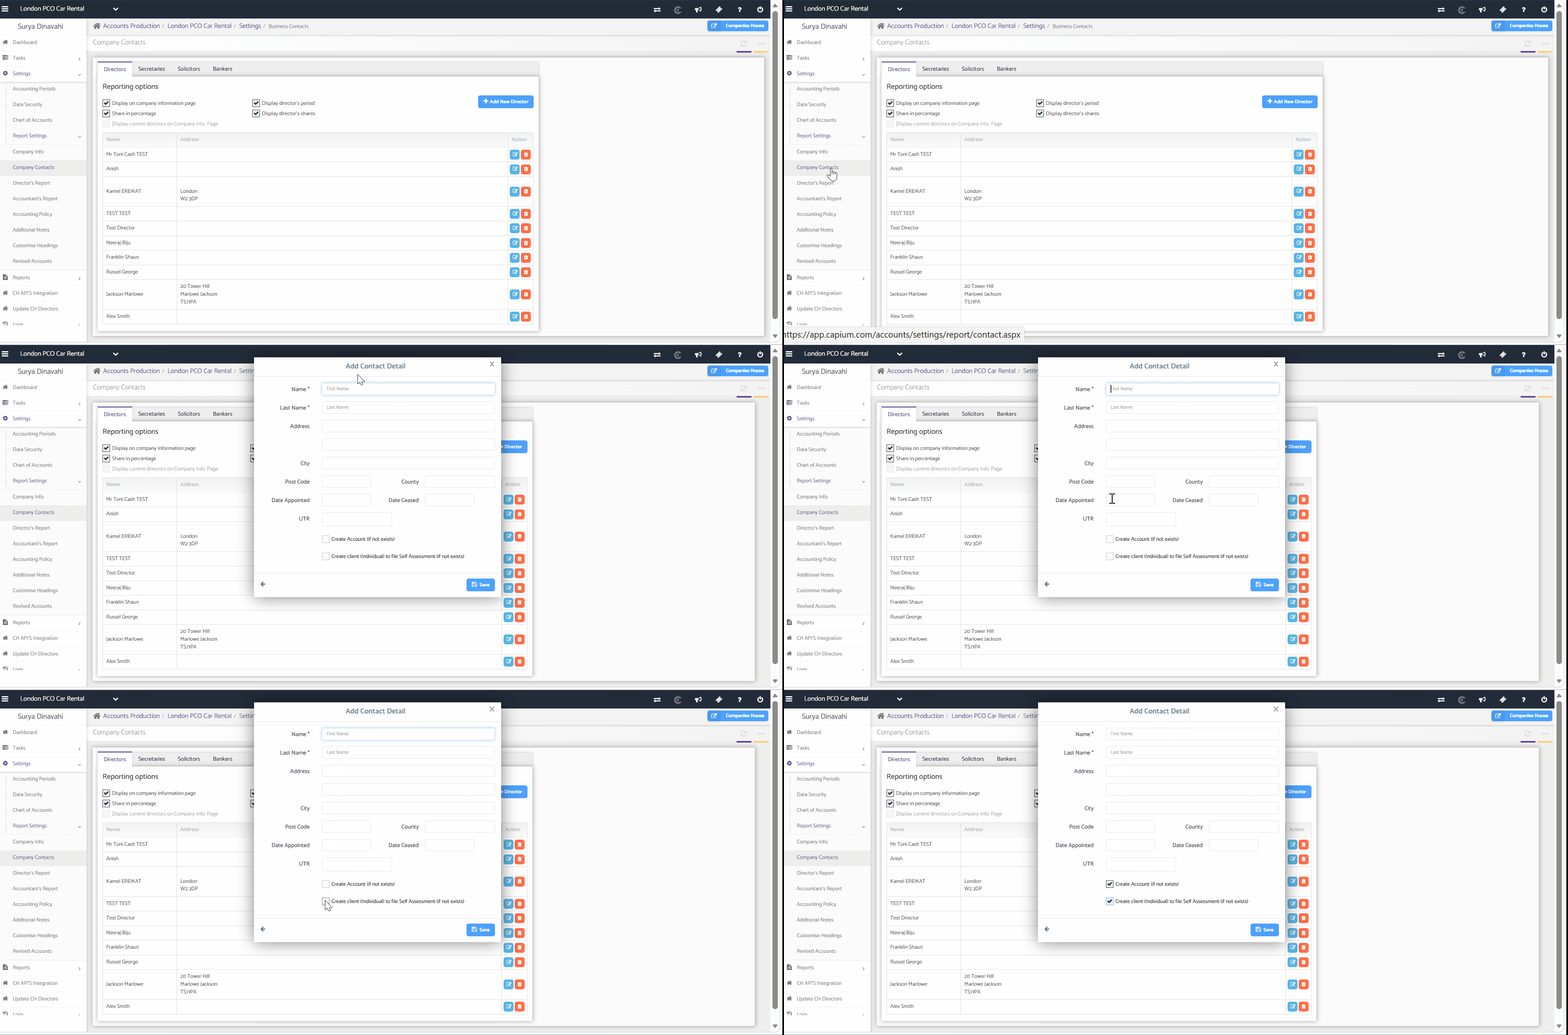
Step 2: Display the Director on Company Reports and other reporting options:
Navigation: Accounts Production > Client specific > Settings > Company Contacts > Directors
If you would like the director's name to appear on the Company's Information page within generated reports, select the Display on Company Information Page checkbox.
You can also choose which additional director information should appear in the report by selecting the relevant checkboxes:
- Share in percentage
- Display director's period
- Display director's shares
Select the appropriate checkboxes based on the information you would like to include in the generated report. Only the information corresponding to the selected options will be displayed in the relevant report sections.
Please check the below picture for reference:
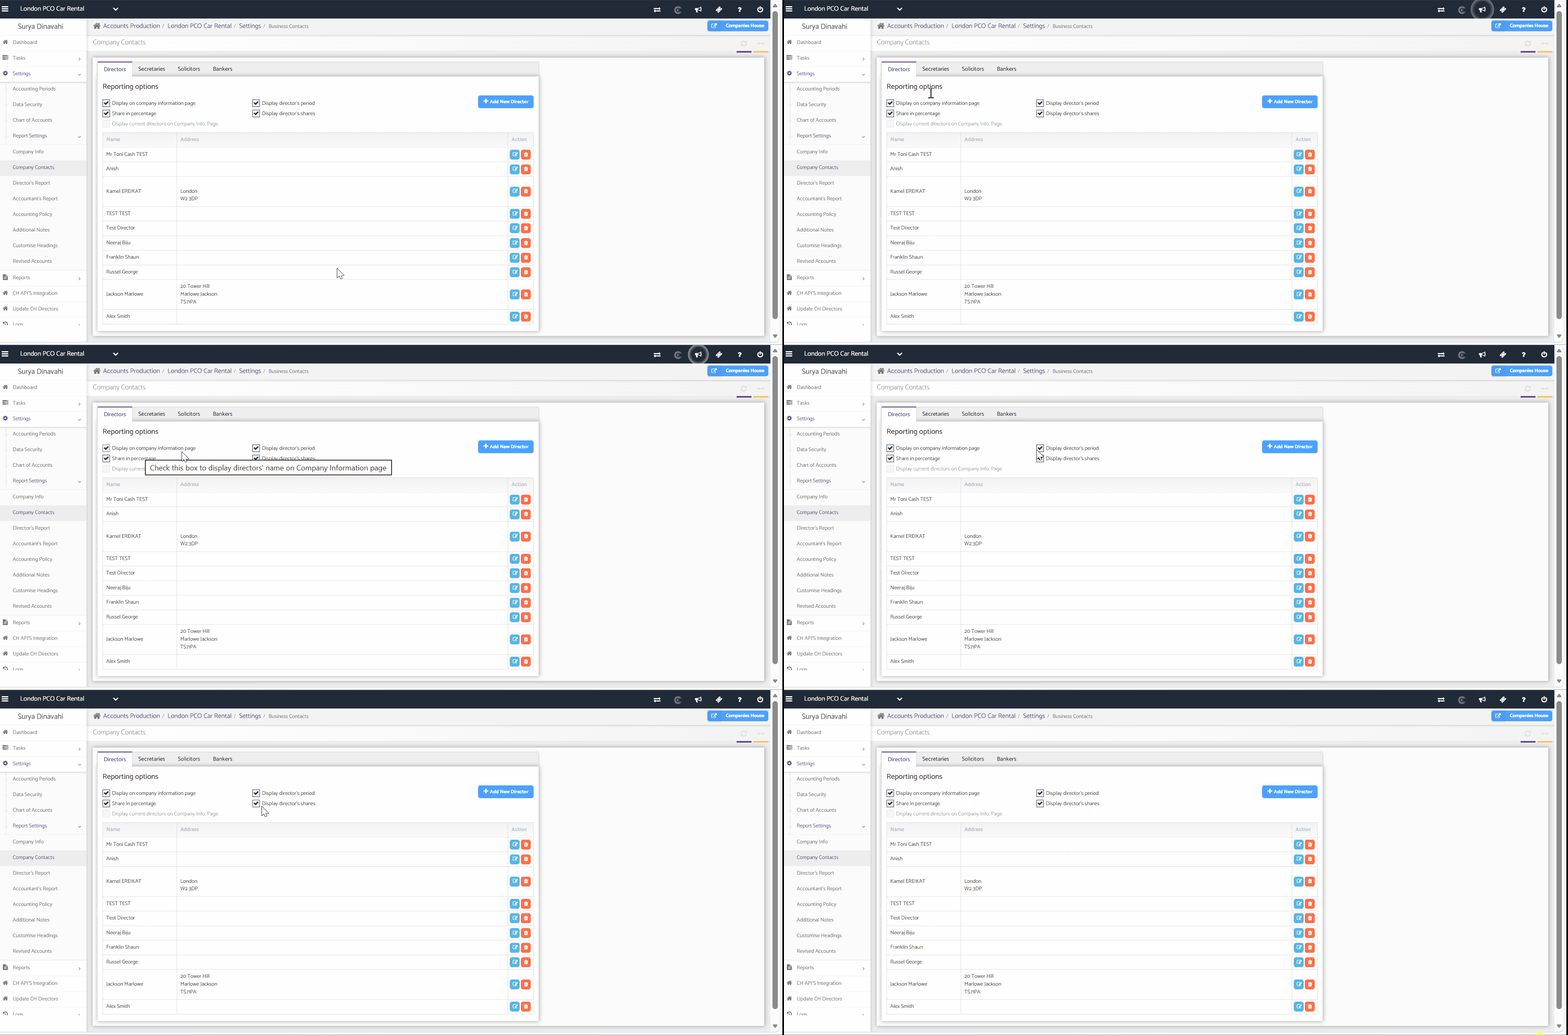
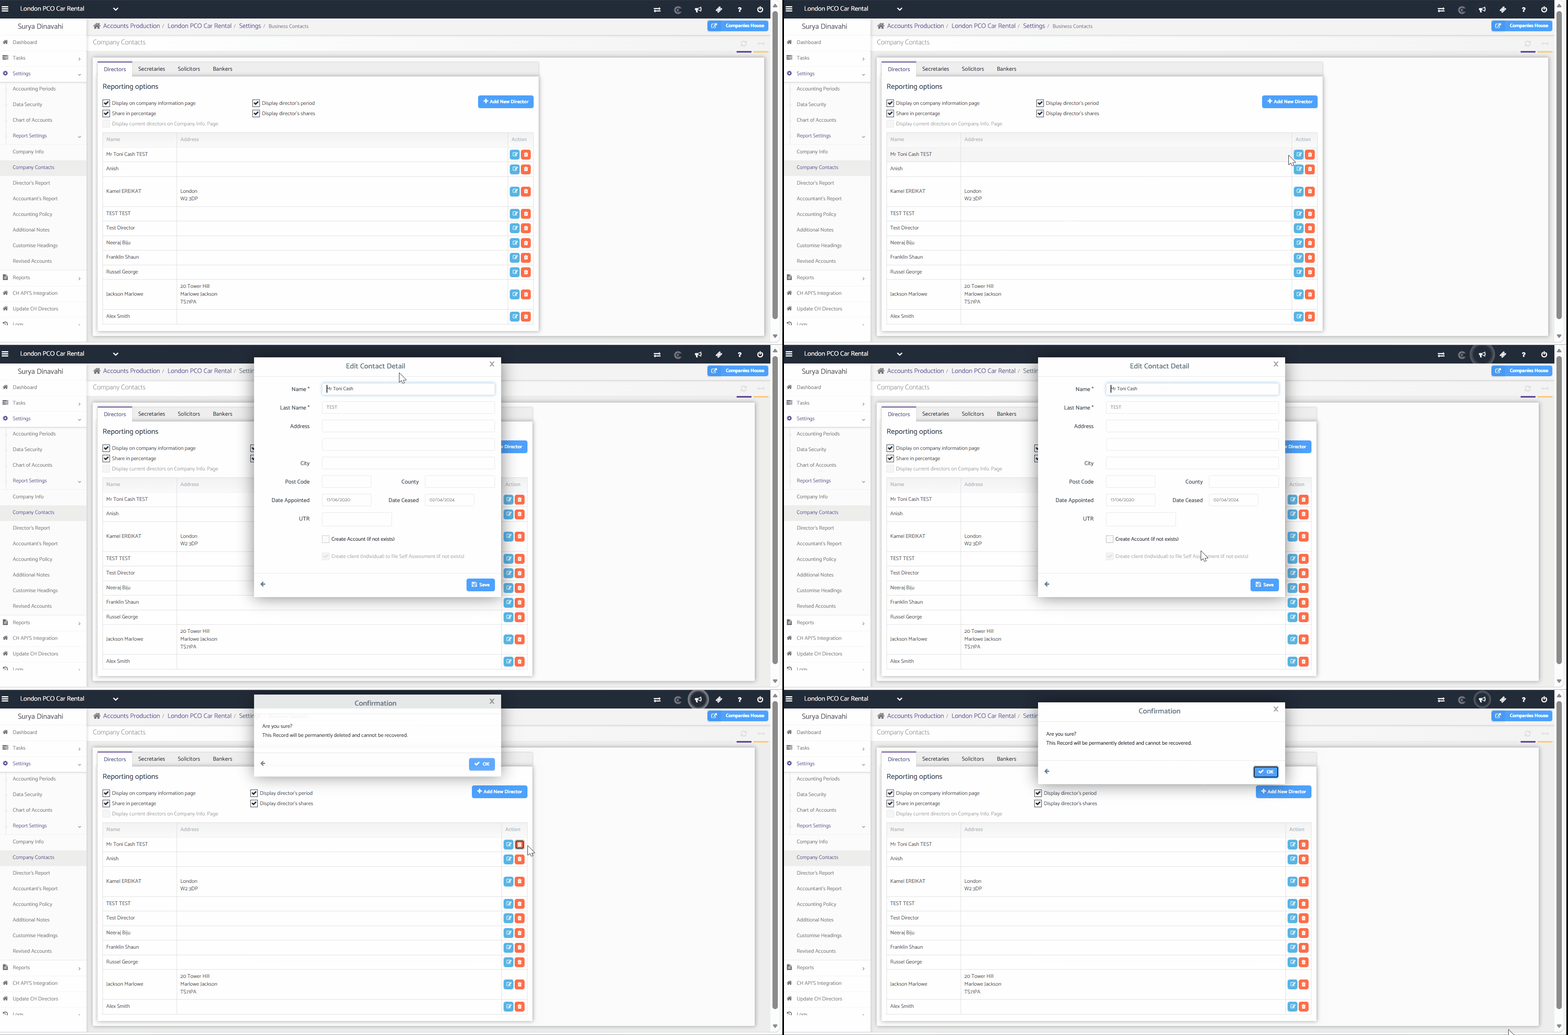
Step 3: Edit or delete a director:
Navigation: Accounts Production > Client specific > Settings > Company Contacts > Directors
You can amend the details of existing director's records using the available actions.
Edit – Update the director's information.
Delete – Remove the director from the company records.
Please check the below picture for reference:
Next step:
Once the information has been verified, the annual reports will be generated for review. This will ensure that all required details have been included and are displayed accurately and correctly.
Additional Help
Need Help?
If you need assistance or guidance, please contact your onboarding manager or email Support@capium.com, or call us on 020 3322 5578.