Location: Bookkeeping module > Dashboard > Purchase > Purchases
Click here to watch how to create a new Purchase Invoice
Click here to watch how to edit a Purchase Invoice
Click here to watch how to import Purchase Invoices
To create a new Purchase Invoice, click on ‘New Purchase’ button.

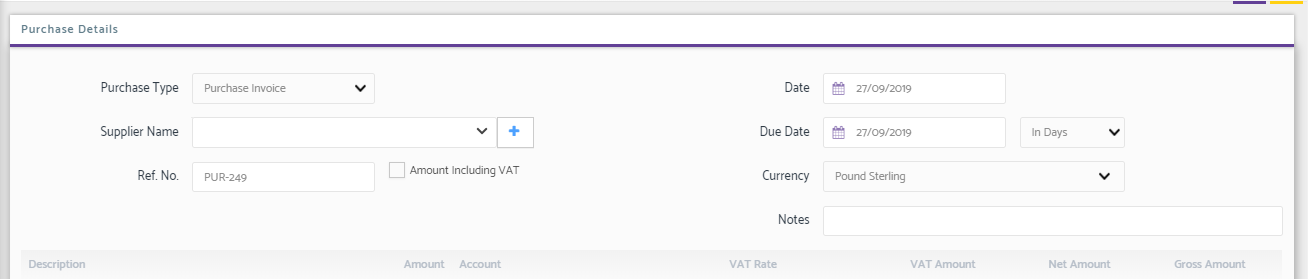
Purchase Type: You can set the Purchase Type as Purchase Invoice or Credit Note.
Supplier Name: Can be selected from the drop-down but you can add a Supplier from the + button.
Reference No.: It is generated by the system automatically although it can be modified
Amount Including VAT: If you want to include the VAT amount in the total amount of purchase then tick this checkbox.
Date: This will show the current date by default, but can be modified
Due Date: It shows the system date by default but can be modified

The next section (in the square box above) is related to the description and amount details, described below:
Description: Description of the Purchases
Amount: Cost of the Purchase
Account: The Particular Account Code needs to be entered as per the Chart of Accounts.
VAT Rate: The VAT rate can be selected from the drop-down.
VAT Amount: Calculated automatically based on item values
Net Amount: The Net Amount box does not include the VAT Amount if the ‘Amount Including VAT’ checkbox is not ticked. If the Amount includes VAT, then the VAT Amount is deducted from the Amount and is shown under Net Amount.
Delete Icon: If you want to delete the record, click on this Icon.
+ Row: This button lets you Add a new row where you may add further purchase.
Payment: This box shows the Payment made. By default, the total amount is shown under Trade creditors column. You may allocate the payment from the select Account drop-down and allocate the amount.
Save as Draft: Tick this check box if you want the Invoice to save as draft.
Save & Close: Click on this button to save the Invoice and close the menu.
Save & New: As you click on this button the Invoice will be saved and you can create a new Invoice.